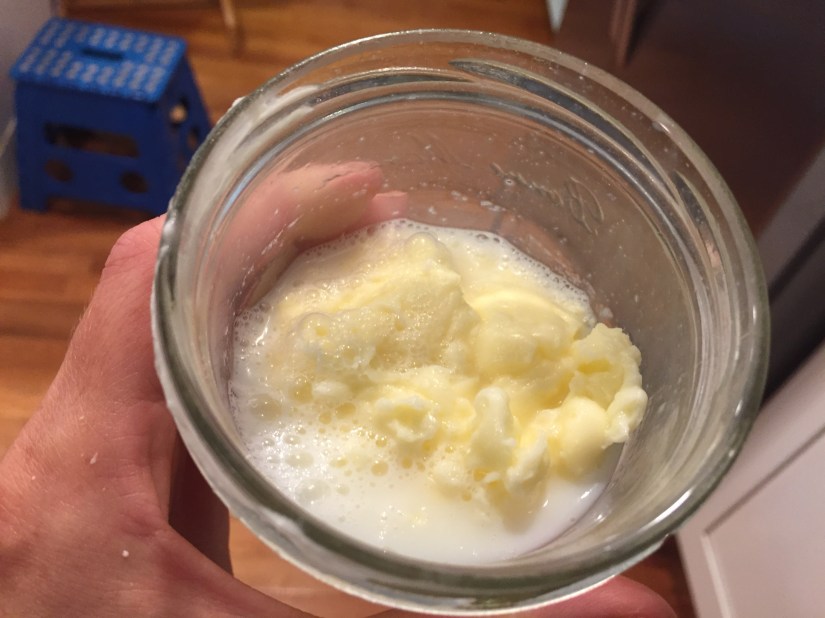
Still baking bread? Why not try making homemade butter too – it’s super easy and tastes great!
Making our own butter has always been a favorite science experiment at our house. The kids never seize to be amazed at how shaking cream in a jar with a marble can turn into a delicious treat we spread on our bread! Making butter from scratch is super easy and so much fun for kids of all ages. All you need is some heavy cream, a mason jar with a lid, a marble (optional) and a little patience!
Ingredients and Materials:
Mason Jar & lid
Heavy Cream
pinch of salt
clean marble
Directions:
Fill your mason jar half-full with Heavy Cream
Add a pinch of salt and a clean marble (the marble is just a fun idea that helps churn the cream into butter and add some extra fun when the kids shake it up)!
Put on the lid and shake it up. The marble will click around and when you don’t hear it anymore or it starts to thud, your butter should be done! The whole process should take about 10 minutes depending on how vigorously you shake the jar and how much cream you have put in.
You’re butter is done once you see a clump of butter has separated from the buttermilk! Carefully pour out the buttermilk and save for later use (great for baking).
Put the butter in a bowl and rinse with cold water, carefully squeeze it to get the remaining buttermilk out.
Spread your butter on some fresh bread or muffins and Enjoy! (The butter will last in the fridge for about 5-7 days, but it will probably be eaten up before then)!
The Science Behind Homemade Butter
When whole milk is left uncovered in the refrigerator tiny fat molecules float to the top, forming a layer of heavy cream. This cream can be separated from the milk and used to make butter. When you shake heavy cream in the mason jar, the agitation causes the fat molecules in the cream to clump together. During this process, the water molecules separate from the solid mass and create buttermilk. The cream goes through a physical change when it is churned into butter.
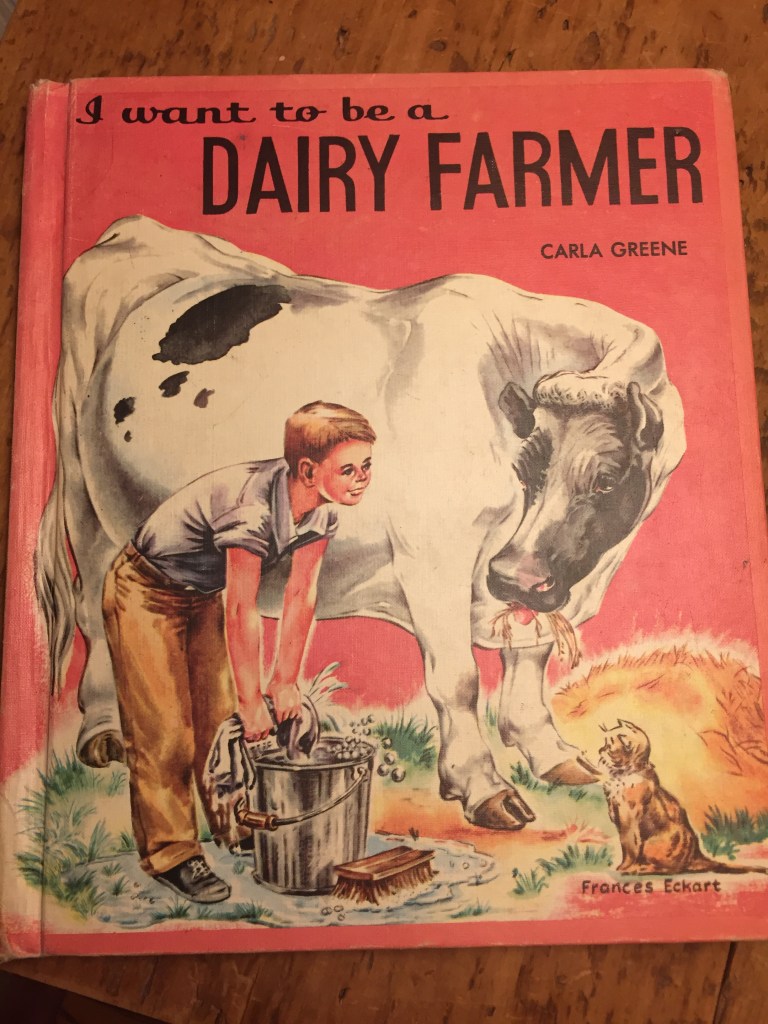
Some Great Informational Books for younger kids on Dairy Farming:
Here’s a great educational demonstration about making butter in the early 18th century by the Townsends.
Have Fun In The Kitchen Making an Edible Science 18th Century Treat!
Long ago in a time before modern conveniences like refrigerators and freezers, fermented foods were in everyones diet. Heck – most of our grandparent’s probably had more fermented foods in their diet than we do today! Fermented foods contribute to a strong gut flora which in turn contributes to a strong immune system. For all of us, our immune health starts with what we eat and what is in our gut. Even if you aren’t fermenting your own foods, there are plenty of ways to get some good old-fashioned fermented fun into your diet. Pickled Beets, Sauerkraut, Gingered carrots, pickles and Kimchi are all fermented vegetables that can be purchased at most food stores and if you’re really lucky, you may live in an area where you can buy fermented goods from your local farmers! Eating a tablespoon size amount of fermented foods 1-3 times a day can aid in building a strong deep immune health.
One of my favorite small businesses to buy good organic fermented food from is Real Pickles. If you’re feeling adventurous, next step will be to start fermenting your own foods right at home. I’d recommend starting with homemade pickles, sauerkraut or gingered carrots. Fermented foods definitely aren’t for those with sensitive taste buds, but once you give it a try, the rewards far outweigh the taste and you may even grow to like it!
Some beef bones from our local dairy
Bone Broth:
It sounds a bit intimidating, but really all you have to do is make your own chicken/beef/turkey stock using the bones. The important thing about this is that you are buying good quality meat, preferred organic, free range and/or grass-fed and not treated with antibiotics or other hormones. Bone Broth is Wonderful for strengthening your deep immune system. Easiest way to make it is to use a slow cooker and add your meat bones and any other veggie scraps you have saved up; onions, garlic and the skins, herbs, carrot tops, stems from greens, ginger – anything that will add to the flavor and nutrients, add 1/2 cup apple cider vinegar and enough water to almost fill the pot, cover and bring to a boil. Reduce to a simmer and cook for 24-72 hours. Let the broth cool, strain it, add salt and pepper to taste. It can be refrigerated for up to a week and you can freeze it for up to 6 months. You can drink the broth as you would a cup of tea or use it to cook rice, pasta and as a base for your soup. Getting one cup of bone broth into your body every day is extremely nourishing for your immune health.
Brands we use and really like
Elderberry Syrup:
Elderberry Syrup is a great addition to your diet especially when you feel run down or are starting to fight off a cold. During the Fall and Winter I give my family Elderberry Syrup Daily. This one is definitely easy to add to your diet because it has a great taste.
Egyptian Black Seed Oil:The Miracle Black Cumin Plant “Nigella Sativa“
This is a new immune booster that Mike and I have recently discovered and researched. To me, it’s like a miracle drug because it is a go to for numerous ailments, especially used for strengthening your overall immune health and well-being. Black seed oil comes from the Black cumin plant’s seeds. The historic evidence shows Black Cumin, or Nigella Sativa, was grown from the rich soil of the Nile River Delta in Egypt and has been used for over three thousand years to aid in digestion and overall well-being. I add a tablespoon to my oatmeal or smoothies and sometimes to my tea or a glass of switchel. You can also use the oil on dry, irritated skin. The oil has many health benefits. For further reading you can explore this text by Doctors Schleicher, and Saleh:
“Black Cumin: The Magical Egyptian Herb for Allergies, Asthma, and Immune Disorders” by Peter Schleicher M.D., Mohamed Saleh M.D. Start reading it for free: https://a.co/7mQcOuY Download Kindle for Android, iOS, PC, Mac and more http://amzn.to/1r0LubW
Exercise:
The benefits of getting outdoors and moving your body are immeasurable. It isn’t always easy to do, but a little bit of exercise every day goes a long way for your mental, physical and especially your immune health. Ride a bike, take a walk, go on a jog or hike, kayak, swim, play a game of catch or kick ball in the yard with your kids. Take a walk with your kids or partner when you can – it is a therapeutic experience for you all to share together.
Mindfullness Exercises:
Finding time for yourself and moments of quiet are extremely important for recharging and resetting your mind and body. We all need moments of quiet and calm in our day to reflect on what we’re doing and what we’re feeling inside. Research shows that relaxation exercises minimize chronic pain, lower blood pressure, sharpen concentration and even improve the function of the immune system. Let go of the stress and appreciate the beauty of the present. It is nourishment that only you can make time for, but is so important to your health.
Sleep:
After having four children, I don’t feel that I’ve slept much in the past 11 years, but whenever I can get rest – I do! Sleep is so essential to your health. It is your brains way of recharging and preparing for the busyness of the day ahead. Sleep is also essential to your immune health. All things are handled better after a good nights rest – encourage it for yourself and your children. When one of us in our household doesn’t get a good nights sleep, we all pay for it – so work together and all your immune systems will benefit!
Wising you all Good Health!
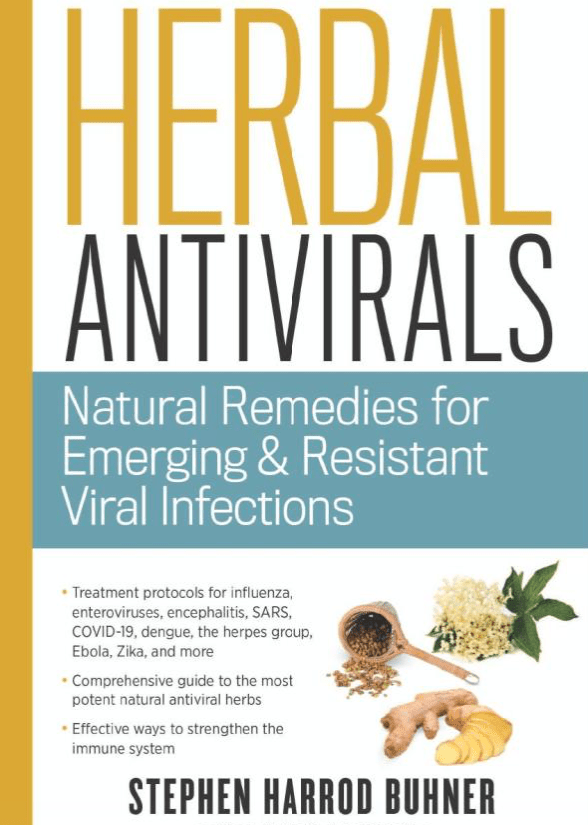
If you’re interested in doing any more reading on ways to fight viruses – Herbal Antivirals: Natural Remedies for Emerging & Resistant Viral Infections by Stephen Harrod Buhner is a great resource.
I love summer squash and zucchini. To my great fortune, this year my garden is plentiful of it! Thankfully, both of these vegetables can be cooked and eaten so many different ways. I love to sauté some zucchini on the stove top with olive oil, chopped garlic and a little salt and pepper. I also love roasting it in the oven tossed in olive oil, salt, pepper and some parmesan cheese. Currently, my kids two favorite summer squash and zucchini recipes are squash fritters and zucchini bread- no surprise there! We’ve added our personal touch to some pretty basic recipes that we thought we’d share with our fellow gardeners who are also trying to figure out what to do with all that squash! Enjoy!
I have found these freeze up nice once shredded and stored in a freezer bag. Quick and Easy!
Summer Squash Fritters (We use the yellow squash for these)
Ingredients:
2 Cups Yellow Summer Squash or Zucchini shredded
8 Tablespoons Flour
2 Large Eggs
1 Teaspoon Baking Powder
1 Teaspoon Salt
1/2 Teaspoon Pepper
Chopped fresh Basil leaves
Half an Onion shredded
2 Tablespoons Parmesean cheese
Vegetable oil and 2 Tablespoons Butter for frying pan
Directions:
Mix all ingredients in one bowl
Heat oil and butter in large frying pan (enough oil to cover the fritters half-way)
Scoop a small pancake size dollop of batter into the pan once oil is heated
Cook on one side about 2-3 minutes until browned then flip and do the same on opposite side
Once done, move fritter to a plate with paper towel to absorb extra oil
My kids love these served hot with ketchup and fresh sliced tomatoes!
Lemon ZucchiniCake
Ingredients:
2 Cups Zucchini shredded
2 Cups All Purpose Flour
1 Tablespoon Cinnamon
1 Teaspoon Ginger
1/2 Teaspoon Nutmeg
1 Teaspoon Salt
1 Teaspoon Baking Powder
1 Teaspoon Baking Soda
1 Teaspoon Vanilla Extract
Zest and Juice of 1 Lemon
2 Large Eggs
1 Cup Brown Sugar
1/4 Cup Coconut Oil – or Vegetable Oil
1 Tablespoon Butter for Pan
Directions:
Mix all dry ingredients and wet ingredients separate then Combine
Butter a 13 x 9 inch pan
Pour batter into pan and bake at 350 degrees for 30 minutes
Icing:
Mix juice of one lemon with enough confectioners sugar to make an icing consistency to pour over cake when cool
Enjoy!
This Zucchini Cake Recipe is adapted form a Wonderful Italian Cook that the kids and I like watching on Youtube. She reminds me very much of my own Nonna and has some authentic Italian dishes you might enjoy checking out.
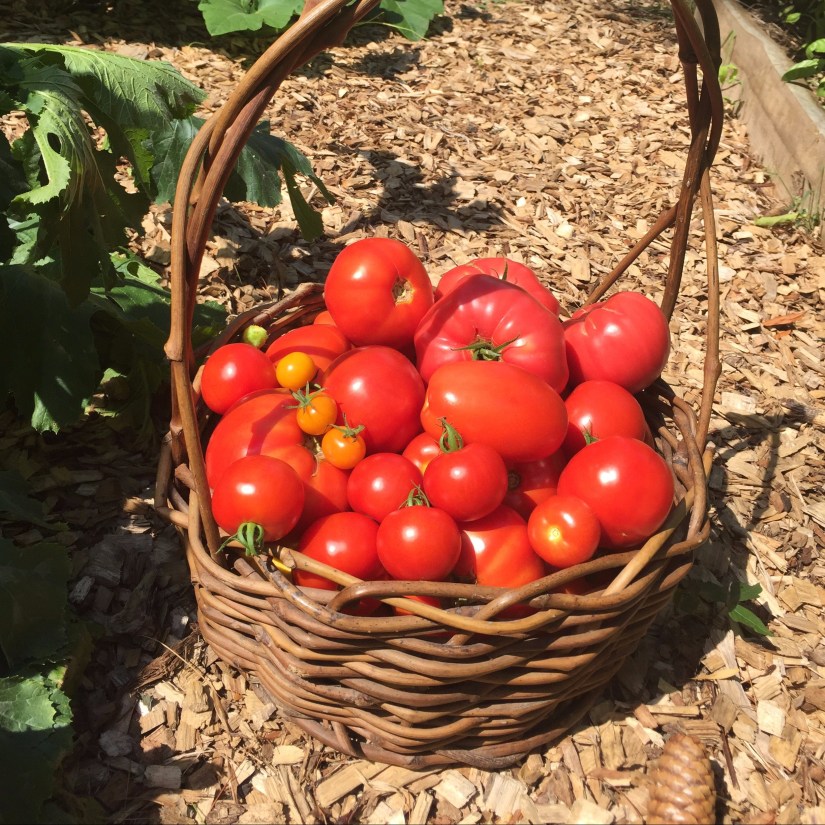
About six months ago after our first family adventure in our camper and gaining a new appreciation for living in a simpler way, I wished for a slower pace to life. Fast forward a couple months and I got it! Never could I have imagined that it would be forced upon us! And never would I have wished for a global pandemic to bring this slower pace. But, with a slower pace and more time on our hands we were able to pursue another wish of mine, a big garden with lots and lots of tomatoes! Thankfully to a very hearty compost delivered by our local dairy farm and to the hard working hands of my husband, kids and myself, the tomato dream has come to us in bucket loads!
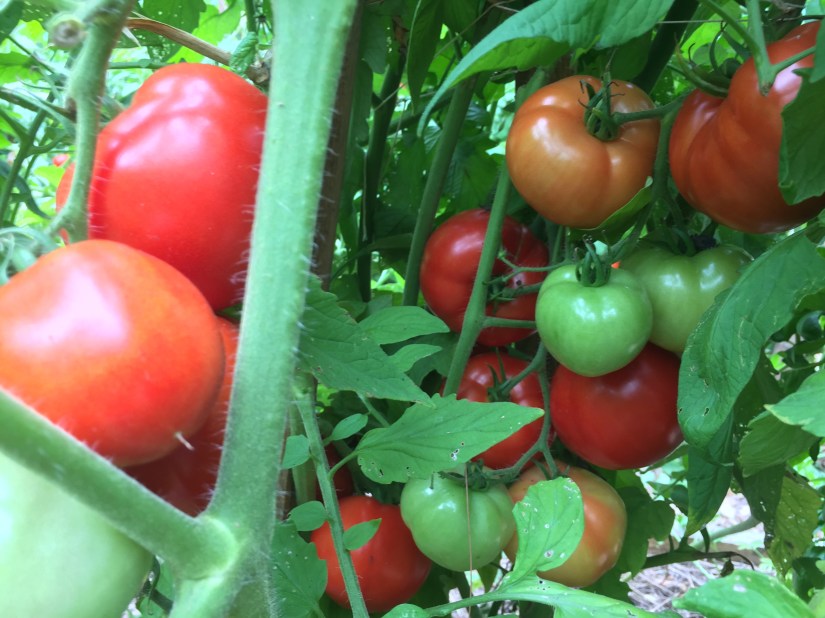
We planted numerous varieties of tomatoes this year; Brandywine heirlooms, Early girls, Sun Gold cherries, Fourth of July, Big Boy Brandywines, Plum tomatoes and lots of cherry tomatoes. Little did we know how prolific the plants would be and how good a growing season we would have. The kids and I are out there every day inspecting the tomatoes and gambling on which ones are ok to leave for tomorrow hoping the slugs and other small hungry visitors won’t eat them before we get to them. It’s a risk we’re not always willing to take, but Our tomato storage capabilities are reaching their max. I feel more and more like my Italian Nonna everyday as I care for my tomatoes with the tenderness I do my children and trays fill my house with upside down tomatoes spaced apart and covered with linens in order to prolong their lifespan. Like us, the tomatoes are also better off social distancing to insure their health and longevity.
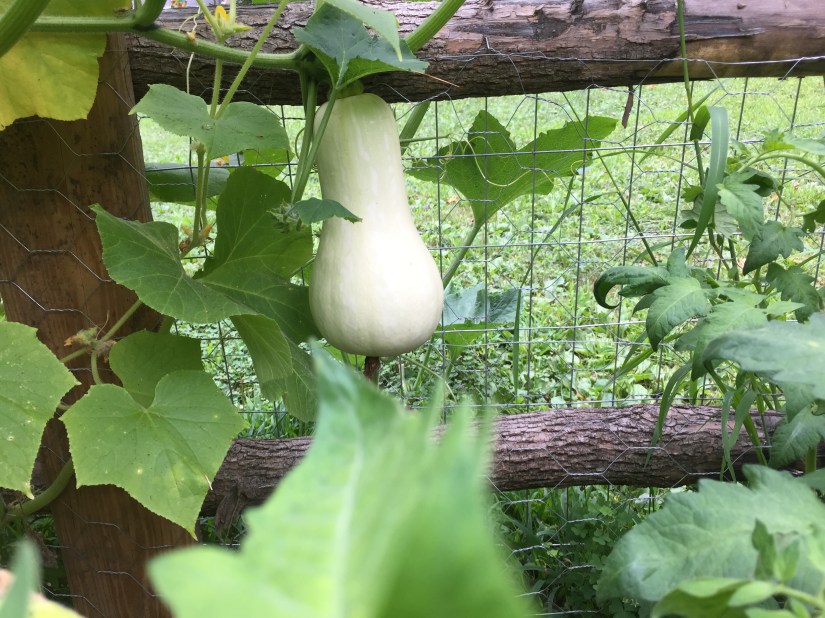
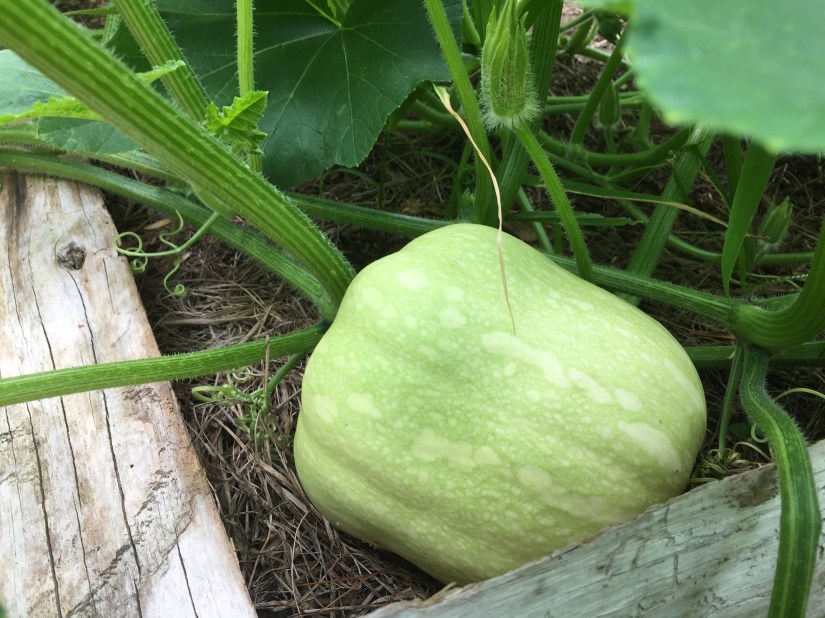
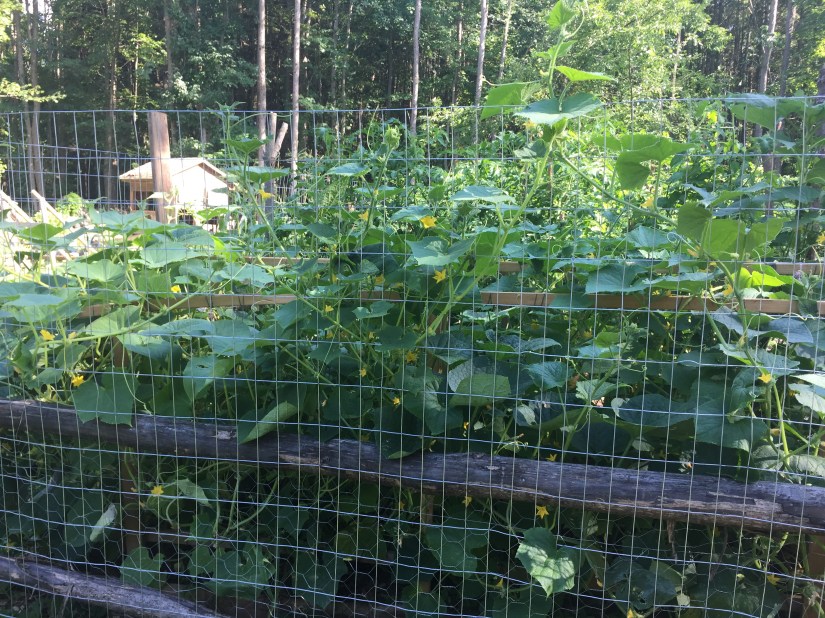
I Have been making sauce, canning, jarring, freezing, sun drying and roasting tomatoes daily. We’re eating many tomato sandwiches with fresh pesto and mayo. There is nothing quite like the amazing taste of a vine ripened tomato. It’s a simple thing that can bring so much joy. The tomatoes seem never ending and the garden is beginning to feel a bit like Big Anthony’s garden from the Strega Nonna storybook! For those not familiar, his garden is a bit out of control, but the unwieldy magic of a garden continues to be truly delightful and exciting! We keep finding new surprise plants that have sprung from our dirt and are now bearing fruit. We have butternut squash trellising across our fence, an unknown squash growing in the pumpkin patch and compost bin, cucumbers growing in our pot of Canna’s and a giant gourd plant taking over a flower bed!
Butternut squash seeded itself into the garden
Another squash surprise that is an unknown!
Every meal seems to be a new creative adventure. We have roasted some of Leo’s giant pumpkins and made lasagna size pumpkin pies! With plenty pumpkin purée leftover to fill our freezer for later use. We can’t get enough squash fritters, zucchini bread, fresh garden salsa and cucumber salads! We’ve even gotten pretty creative with our pesto recipes and made beet green, kale and basil pesto with almonds and walnuts. We’ve gone Greek and made home made Tzatziki along with feta, tomato, cucumber wraps. The magic of the garden keeps on giving and continues to renew and recharge our mind, body and soul!
Some Arugula seedlings springing up in the garden
We have harvested all the carrots, beets and lettuce and have started new plantings for an early fall harvest. There are so many great vegetables you can plant in August for most planting zones that will allow for a crop before winter. We have put in bush bean plants, arugula, spinach, mesclun salad mix, kale and broccoli rabe (a bitter green similar to broccoli). Some other vegetables that you can plant now are radishes, carrots, beets (for beet greens and small beets), Swiss chard, and garlic.
The kids are drying out seeds from the tomatoes, green beans, cucumbers, banana peppers and pumpkins to save for next year.
To Plant a Garden is to Believe in tomorrow.
Audrey Hepburn
There is something so therapeutic about working the earth, growing your own food and cooking and eating together. It is a tradition I hold dear to my heart that I am grateful to pass down to my children. Sunday dinners at my Nonna’s house packed into her tiny kitchen with my Aunts, Uncles, Great Aunts and Great Uncles, cousins and friends eating a home cooked meal from the garden while listening to them debate over who found the cheapest grapes and broccoli rabe – are some of my dearest childhood memories. As a young girl I didn’t quite understand why my grandparents worked so hard when you could buy everything at the food store? Yet, there was something special about what they did that struck me even at an early age. Both my grandparents have since passed, but I feel their presence shining over me each time I set foot in my garden and get lost in the rows of tomato plants. They were two very hardworking people who lived very simple and always shared the fruits of their labor with those they loved. They were the original ‘Farm to Table’ farmers. The way they have shaped my life to appreciate the simple things, to know where my food comes from and to respect the earth that feeds me, is profound. They have gifted me with the secrets to the true riches in life, good food, family and friends- and for that I am ever grateful.
If I am so lucky to be granted a third wish, It would be that – All who have tasted the pleasures of the earth work together to preserve it. Be that in the garden and in life.
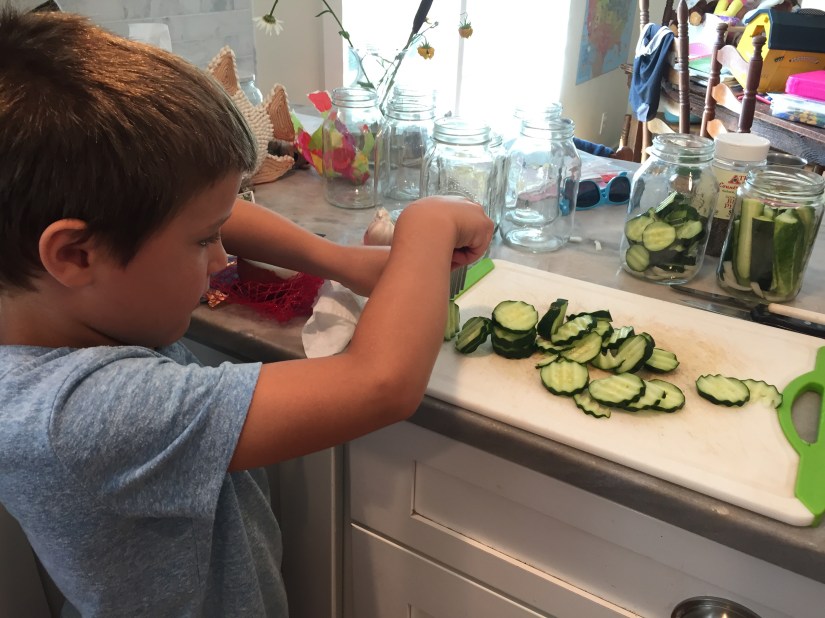
This pickling project was spearheaded by Leo. He loves pickles and was so excited by our surplus stock of cucumbers coming out of the garden that he requested we give pickle making a try. I’ve never made pickles before aside from what I call my lazy way of adding cucumbers to the pickle brine of empty pickle jars we bought from the store. It’s worked in the past, especially since we never really had a lot of cucumbers left over to jar. The ‘Homemade Refrigerator Pickle’ recipe we followed from A Spicy Perspectivehttps://www.aspicyperspective.com/best-homemade-refrigerator-pickles/ was easy, simple and the pickles taste great!
Homemade Refrigerator Pickles:
Ingredients:
3 to 4 cucumbers
1/4 cup Vidalia onion, sliced
3-5 sprigs fresh dill
1/2 cup apple cider vinegar
1/2 cup water
2 cloves garlic minced
1 1/2 teaspoons pickling salt or kosher salt
1/4 teaspoon granulated sugar
1/4 teaspoon whole black peppercorns
1/4 teaspoon whole yellow mustard seeds
Pinch crushed red pepper flakes
Fill a clean pint-sized jar with 3 to 4 sliced cucumbers, onion slices and fresh dill sprigs. Leave a 1/2 inch of space at the top of the jar for liquid.
In a small pot heat the vinegar, water, garlic and spices until the mixture comes to a simmer and the salt and sugar dissolve.
Cool the brine down to a warm temperature and fill the jars so that everything is covered with brine.
Close the lid tightly and refrigerate for 24 hours before eating.
Homemade pickles should last for two months in the refrigerator in a jar.
Enjoy!
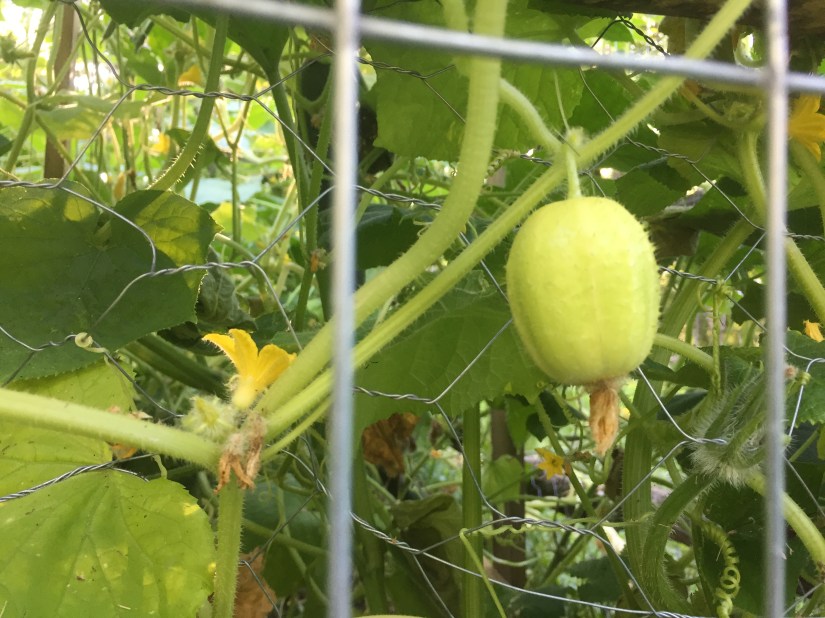
A Cucumber Lemon in the garden
I planted a different kind of cucumber in the garden this year along with the other pickling cucumbers. This one is an heirloom Cucumber Lemon. If you haven’t ever tried it, they are delicious. Crunchy, sweet and can be eaten right off the vine or pickled. Another great addition to the cucumber garden!
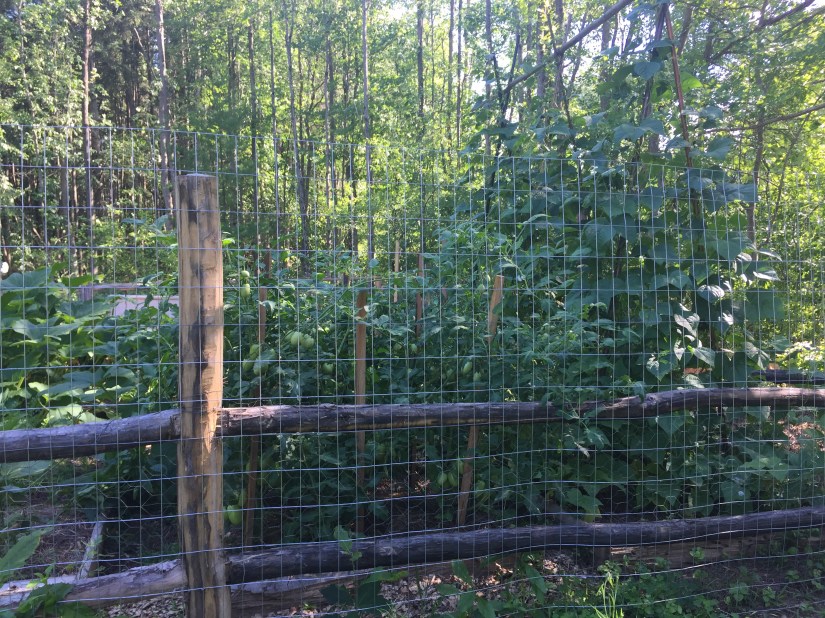
One beautiful gift in my family’s life that has come from this ‘great global pause’ is the time we took to expand our garden. It has been something Mike and I have been dreaming of doing for years and because of the need to remove trees, clear the land from lots of overgrowth, make beds, a fence and bring in some good compost – the task at hand was very labor intensive and time consuming. It was a team effort and we are thoroughly enjoying the fruits of our labor which I am grateful for each and every day.
With the warm July weather, the garden has truly exploded with bounty – and with that, we’ve had some unexpected visitors. One morning, Vivi (my 20-month-old) and I were sitting in the living room playing, when she pointed out the window and said, “Mama, Neigh, Neigh.” I looked and saw these adorable fawns in our yard eating some fresh buds off the stumps of trees we cut down. “But where is the mama?” I asked. “Oh, there she is mom,” said Leo. “She’s in the garden!” In the garden! I jumped to my feet and opened the screen door and there she was happily enjoying my beet greens! I started walking over to the garden as if to kindly ask her to leave and not frighten her babies and as peacefully as she came, she left, jumping over our garden fence. I discovered that the beet greens weren’t all that she likes, she throughly enjoyed our green beens too!
About a month ago, when Mike was working on the fence, he asked me if we should make it higher than 4 feet because deer can jump 6 feet high. I told him that the likely hood of a deer jumping over a fence to get into our garden seemed funny, entirely unlikely and not to worry. Well, rather than eating my beet greens, I’m now eating my own words! Since then, we added a wire addition to the fence so that it now stands at 6 feet tall. The deer keep visiting, but fortunately they haven’t attempted leaping this fence.
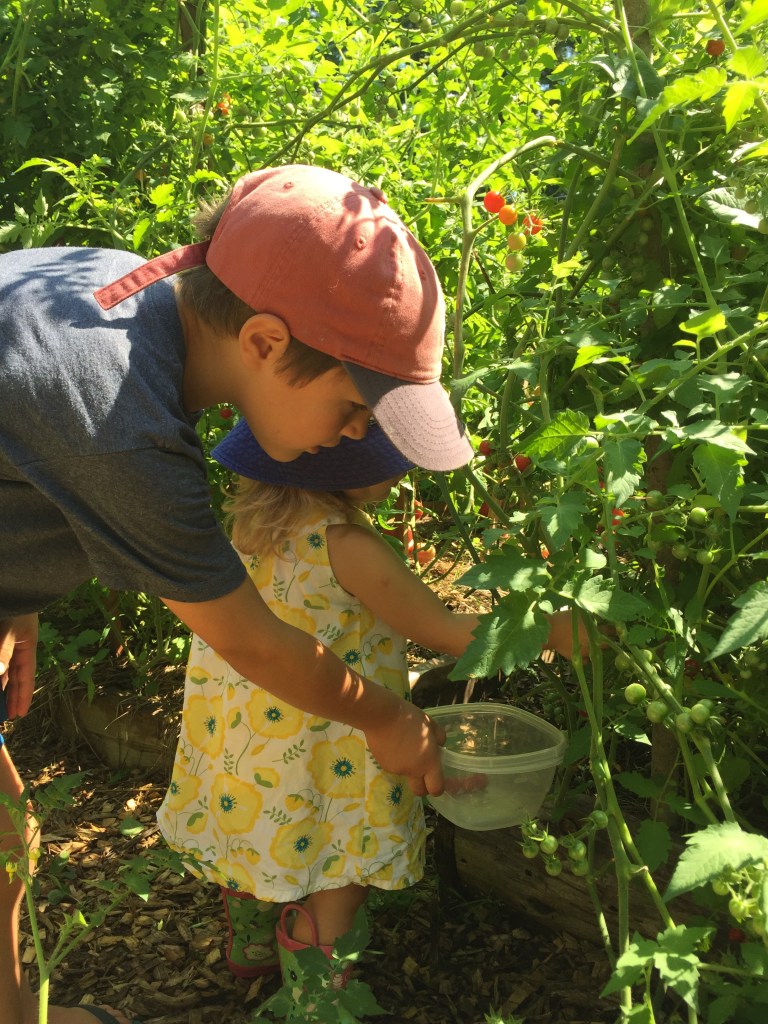
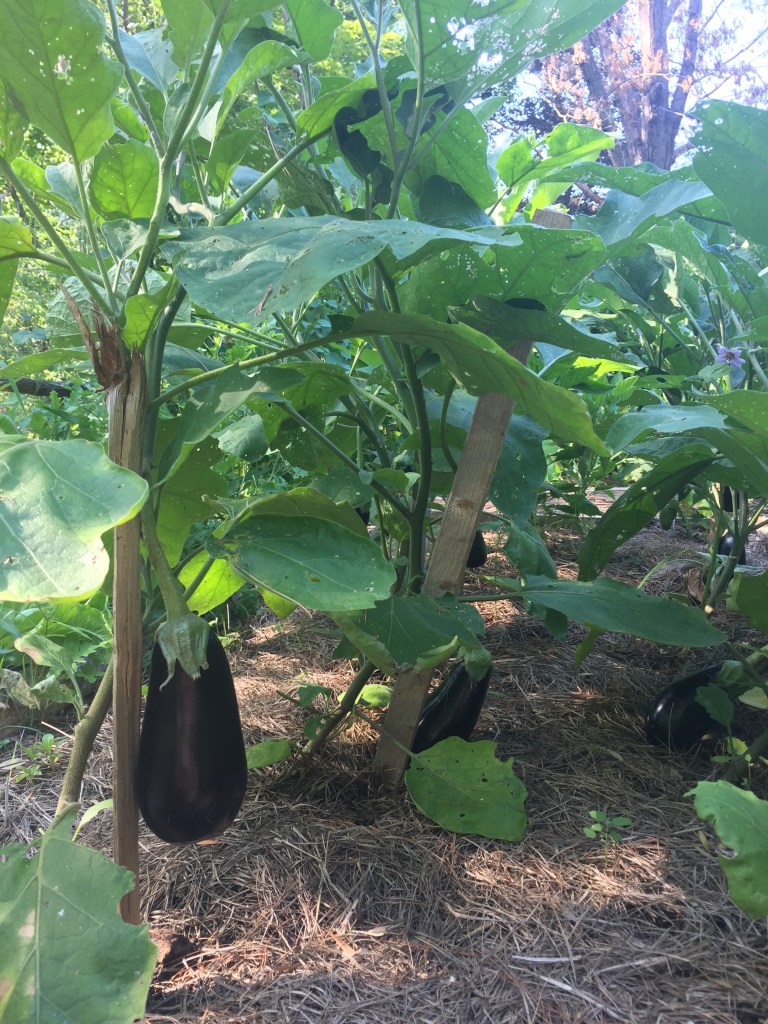
The garden fun doesn’t stop there. The kids are always so eager to pick the ripening vegetables, even before they’re ready and bring them into the house to show me with excitement. We have eaten some small, hard, orange tomatoes, very small and bitter cucumbers and some baby eggplant. No problem, it’s all edible, some vegetables really just taste a heck of a lot better when they are ripe! It has been a good lesson in patience. Fortunately, the kids have now pretty much got the hang of picking fruit when it’s reached its peak, aside from Vivi who still loves those big green tomatoes she calls apples! We check the garden daily scoping out with excited anticipation what we can pick next. Unfortunately, we had another little visitor that was also watching our tomatoes, eggplants and carrots as closely as we were and decided to taste test the fruit too! Instead of eating it all or taking it with him, he just took bites of whatever he liked and left the rest there for us. So, again, we were back to the fence, searching for a spot that the little bugger was using to get into the garden. We found the hole and found another, made some repairs and found out the hard way one night that it was a skunk who was paying our garden a nightly visit.
Now that we have put the garden on lockdown from all visitors except for those that work in it, we have seen things start to flourish again and are having a hard time keeping up with all the goodness. We have been enjoying summer squash, zucchini, cherry tomatoes, early girl tomatoes, green beans, eggplant, cucumbers, cucumbers and more cucumbers! The kids and I have been trying out many zucchini/squash recipes and have been enjoying zucchini fritters, saute’d zucchini, squash and eggplant, and some great zucchini bread along with many cucumber and tomato sandwiches. Leo and I also made homemade refrigerator pickles and as we were packing them into our refrigerator, we realized it was broken! Yes, all my pandemic frozen goodies went with it! Didn’t realize they had all thawed and could only save so much since my oven broke earlier in the week and I was only working with a stove top! Just feel like it was all adding to the slower, homesteading pace of life to be without my appliances! Had to try and go with it, otherwise I may have broke down too! Fortunately, we had a back-up fridge in the basement and were able to save what we had in the refrigerator – especially those pickles!
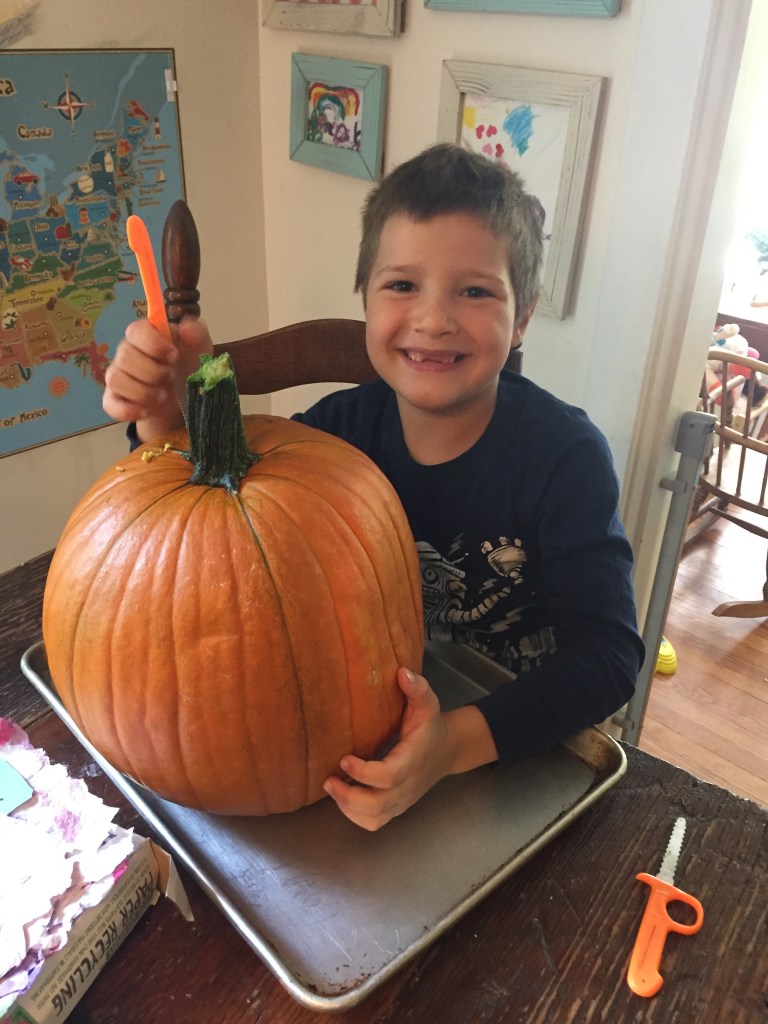
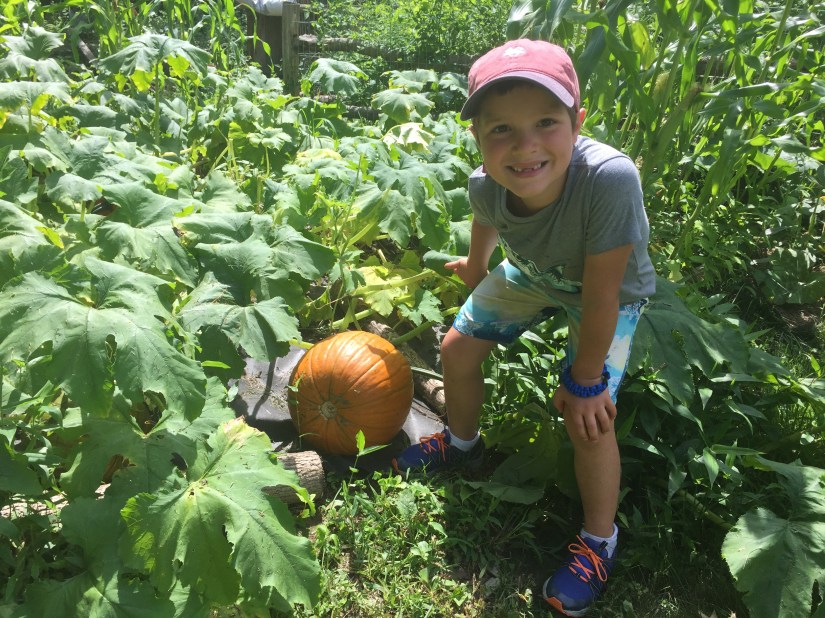
Yes, Believe your eyes, it is an Orange Pumpkin in July in New England!
Leo has decided to celebrate Halloween in July and has been having lot’s of fun carving summer squash, cucumbers and even one of his pumpkins from the ‘Great Pumpkin Patch!’ Can’t help but smile looking at my little guy and his missing two front teeth next to his toothless pumpkin!
I hope you all are enjoying the joys of gardening and celebrating the beauty and bounty of life. The gifts of life are so precious – meant to nourish, to be preserved and above all, Enjoyed – True to the garden. True to life!
Wishing you all Good Health, Good Food and Good Company.
Life is Good!
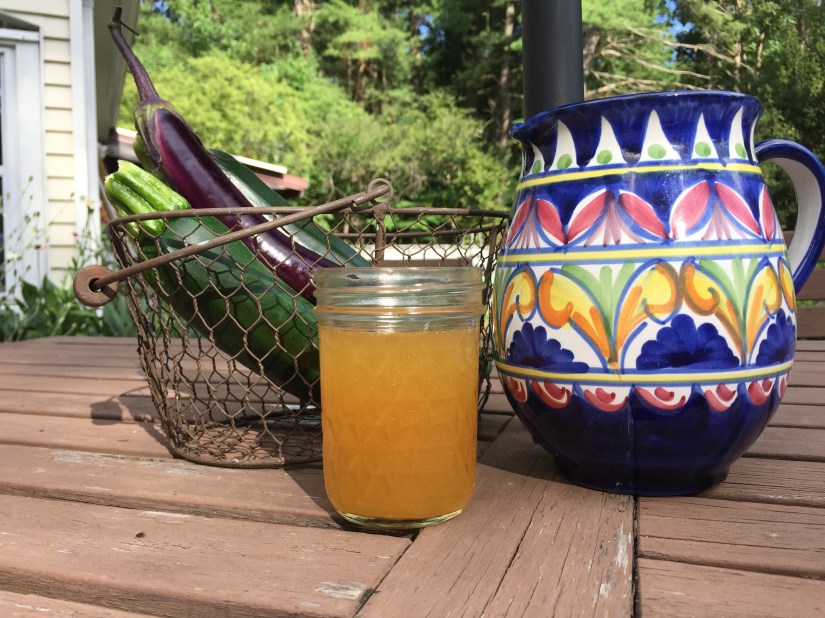
Switchel, it’s easier to make than it is to pronounce! Although, my kids really get a kick out of saying it, especially Leo now that he’s missing his two front teeth! First time I ever had this old-fashioned energy concoction was years ago on my father-in-law’s farm. After a long day working in his garden, he had mixed up his own switchel and offered me a taste. It definitely packs a punch, but as I’ve learned through experimentation, there are so many ways to mix it up so that it’s pleasurable to most tastebuds.
Switchel is an 18th century energy drink that restores the bodies electrolytes while also boosting the immune system. It is easy to make and allows for some creativity. Your standard Switchel is a 1/2 gallon water, 1/4 cup apple cider vinegar, 1/2 cup molasses (not black strap), maple syrup or honey and a tablespoon ground ginger or minced ginger (first steep minced ginger in water and then add just the liquid to the drink filtering out the ginger pieces). This really is a much healthier version of the energy drinks you buy today and cheaper to make! It is an excellent summertime drink that helps rehydrate your body and build your immunity for the fall cold season to come. In the cooler weather I like to add 1 tablespoon Apple Cider Vinegar, 1 teaspoon honey and a pinch of ginger to a favorite hot herbal tea like green tea or echinacea.
Even Vivienne at 20 months enjoys a little Switchel!
We have played around with our Switchel concoction at our house and have come up with some great recipes!
Our Favorite Switchel Recipe:
Ingredients:
1/2 Gallon Seltzer Water or Sparkling Water (You could even use a favorite flavored sparkling water)
1 Tablespoon local raw honey and 1 Tablespoon Molases – heated in a little water so they dissolve before adding to the drink
1 Pinch Sea Salt or Hawaiian Pink Salt
1/4 Cup Organic Apple Cider Vinegar
1/2 Cup lemonade, orange juice or cranberry juice
1 Tablespoon fresh ginger, minced and steamed in some water (only add the flavored water – filter out the ginger pieces)
4 drops Elderberry Syrup
1 Teaspoon Egyptian Black Seed Oil (This is excellent in building your immune system, calming inflammation and aiding in healthy gut flora and digestion – you may want to leave this out initially for the kids because it has a very strong taste).
This is the Elderberry Syrup and Egyptian Black Seed Oil that we use
Mix it all together and Enjoy!
Here’s a Great Educational video from the Townsends on making Switchel!
Baking bread from home has been growing in popularity around the globe during this time of great pause. It is an age old tradition that aside from growing your own grain and using rocks to grind it, hasn’t changed all that much over the years. The ingredients are simple, healthy and inexpensive. Nothing quite compares to the smell of fresh bread baking in the oven. If you haven’t yet given bread baking a try, it’s easier than it looks and the taste of homemade bread is well worth the experiment and the wait!
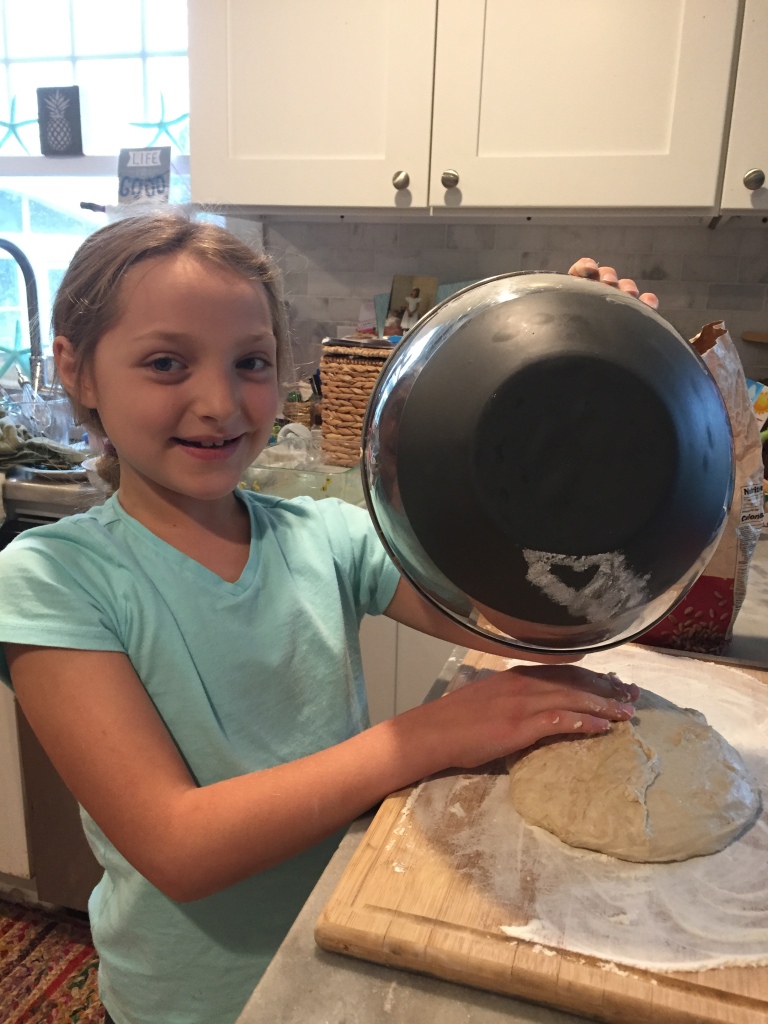
Baking bread has become the new normal in our house. We have even created quite the routine. Ava helps me in the evening prepare the sourdough starter and mix our sandwich bread to sit overnight. Lily has become the official ‘artisan crusty bread’ maker. We have done plenty of experimenting with a variety of recipes from books and online. Not all our bread making has been a success. We’ve made some beautiful looking sandwich breads that have unfortunately crumbled into pieces when we cut them! We also made some pretty hideous looking bagels, but fortunately they didn’t taste as bad as they looked! It truly has been trial and error, but thankfully we have found some wonderful bread recipes that we are sticking too and thought we’d share with those who are tempted to give it a try!
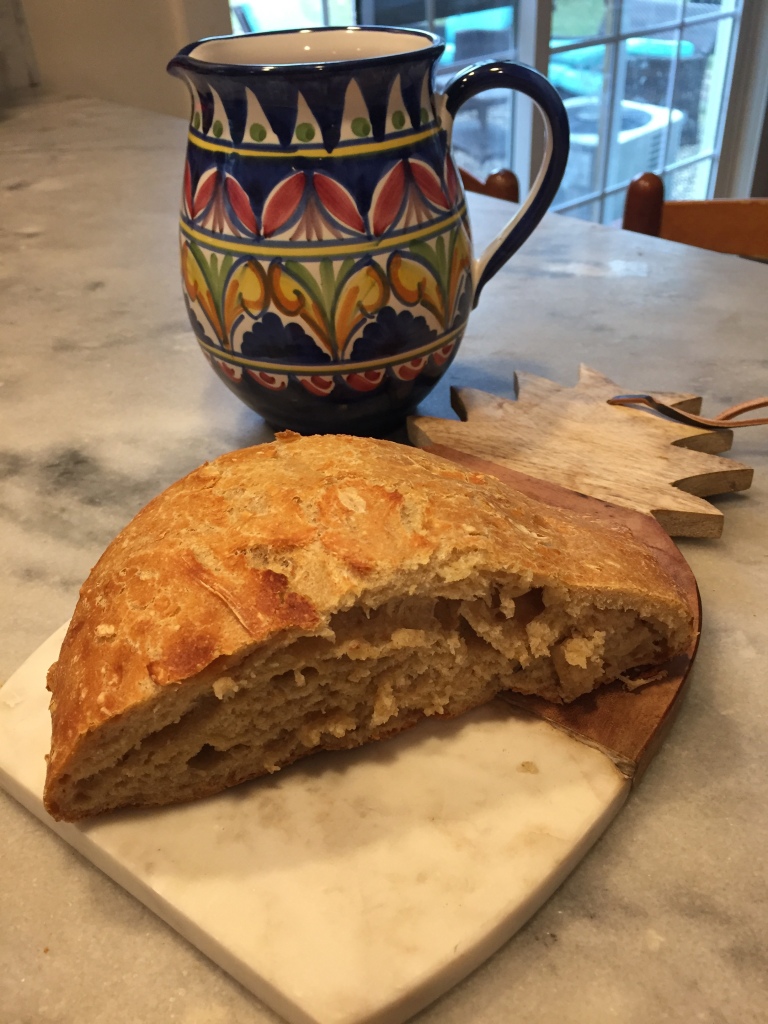
Our favorite and easiest artisan style crusty bread recipe comes from a website I stumbled upon in my bread making searches. This recipe is from a site called Jenny Can Cook. She has a lot of easy recipes and videos that are helpful. For the 3 Cups flour we usually use 2 cups all purpose flour and 1 cup whole wheat. Also, just a note about the water tempature – don’t get scared off if you don’t have a thermometer to test your water temp. We don’t have one, but we have been just fine with a water temp that is warmer than luke warm and just under boiling.
No Knead Crusty Bread
Ingredients:
3 cups all-purpose or bread flour (aerate flour before measuring)
1/4 teaspoon yeast, active dry or instant (1 g)
1 teaspoon salt (6 g)
1 1/2 cups hot water, not boiling (354 mL) – I use hot tap water – about 125-130° F
(about 2 Tablespoons extra flour for shaping)
Instructions:
Combine flour, yeast and salt in a large bowl. Stir in water until it’s well combined.
Cover with plastic wrap and let stand at room temperature for 3 hours.
After 3 hours dough will become puffy and dotted with bubbles. Transfer it to a well-floured surface and sprinkle dough with a little flour. Using a scraper fold dough over 10-12 times & shape into a rough ball.
Place in a parchment paper-lined bowl (not wax paper) and cover with a towel. Let stand on counter top for about 35 minutes.
Meantime place Dutch oven with lid in a cold oven and preheat to 450° F. My oven takes 35 minutes to reach 450°.
When oven reaches 450° carefully, using oven gloves, lift the parchment paper and dough from the bowl and place gently into the hot pot. (parchment paper goes in the pot too) Cover and bake for 30 minutes.
After 30 minutes, remove lid and parchment paper. Return, uncovered, to oven and bake 10 – 15 more minutes. Let it cool at least 15 minutes before slicing.
A really great kids baking book that Nanna sent my kids before the lock down, which has been a lot of fun to explore – especially with more time at home to bake!
Kid Chef Bakes, has been a true gift during the slower pace we now have at home. Nanna’s seem to know just what to send when you’re dealing with a pandemic! The kids and I have baked a lot of recipes from this book and they have all turned out great! The recipes are easy to follow and most ingredients seem to be things you’d have in your pantry. Our favorite bread recipe from this book is the focaccia bread. We make it at least once a week and it’s eaten right up.
Rosemary Onion Focaccia
Ingredients:
For the Bread:
1 Cup warm water (105 to 115 degrees F)
2 tablespoons granulated sugar
1 (1/4 ounce) envelope active dry yeast
3 1/2 to 4 cups all purpose flour
1/4 cup plus 2 to 3 tablespoons olive oil, divided
1 teaspoon table salt
For the Topping
2 tablespoons olive oil
1/2 small red onion, very thinly sliced
1/4 cup shredded Parmesan cheese
2 garlic cloves, minced
1/2 teaspoon table salt
1/8 teaspoon freshly ground black pepper
2 tablespoons fresh rosemary or dried Italian herb mix
Instructions:
Stir together the warm water, sugar and yeast, then let it sit for about 5 minutes
Add 3 cups of flour, 1/4 cup of olive oil and 1 teaspoon salt to the bowl. Mix until well blended. (We do this by hand). Add more flour as needed, a little at a time, until a dough forms. Continue kneading for about 4 to 6 minutes, or until the dough is smooth and elastic.
Grease a large bowl with 1 tablespoon of olive oil. Add the dough, turn to coat, cover with a dish towel and place in a warm, dark, draft-free place to double in size, about 2 hour.
Generously grease the baking sheet with 1 or 2 tablespoons of olive oil.
Transfer the dough to the prepared baking sheet. Spread the dough out into a long oblong shape about 1/2 inch thick. Cover loosely with a dampened dish towel or plastic wrap and return to a warm, dark, draft-free place for 15 to 20 minutes to rest and rise slightly.
Preheat the oven to 400 degrees F and place the oven rack at the lowest level.
Remove the towel from dough and using your fingertips, gently push down on the dough to leave slight dimples. Brush 2 tablespoons of olive oil over the top of the dough. Lay the onion slices on top. Sprinkle the cheese, garlic 1/2 teaspoon of salt (we love course salt), black pepper and the rosemary and/or Italian seasoning.
Bake on the lowest oven rack for 15 to 20 minutes, or until golden brown.
Leo and his personal pizza!
Another great bread recipe from the Kid Chef Bakes book is the pizza dough. Very basic, easy pizza dough recipe that rolls out well and tastes great. Leo has been very excited about making pizza often and is a big help in the kitchen these days. I think it takes a great man to learn his way around the kitchen – so I’m very proud of my little guy and his interest in learning to cook and bake! If you haven’t ever made pizza dough from scratch, this recipe is for you! Buon Appetite!
Homemade Pizza Dough
Ingredients:
2 1/4 to 3 1/4 cups all-purpose flour
1 (1/4-ounce) envelope active dry yeast
1 teaspoon sugar
1 teaspoon table salt
1 cup warm water (105 to 115 degrees F)
3 tablespoons olive oil, divided flour for dusting the work surface
Instructions:
In a large bowl, add 2 3/4 cups of flour and the yeast, sugar and salt.
Add the water and 2 tablespoons of olive oil to the bowl. Mix until the dough forms a soft ball. Mix in additional flour as needed.
Place the dough onto a lightly floured surface and knead until the dough is smooth and elastic 6 to 8 minutes.
Grease a large bowl with the remaining tablespoon of oil, add the dough, turn to coat, cover with plastic wrap of a dish towel and place in a warm, draft-free place to double in size, about 1 hour.
To transform the crust into a pizza, roll out the crust thinly on a floured surface, transfer to a greased baking sheet, then top with desired toppings. Bake at 400 degrees until the cheese is melted and the crust is golden brown, about 10 minutes. (I usually put my pizza crust in the oven for about 5 minutes while it is warming up to start to bake the dough. I then take it out and add the toppings and put it back in for another 5 plus minutes until crust looks a little golden and cheese has melted).
We also continue to make sourdough sandwich bread every other night from a very basic no knead bread recipe. We use a sourdough starter for this one. If you haven’t yet explored making and maintaining your own sourdough starter it is actually less intimidating than it sounds once you get the hang of it. Our original starter developed a pretty funky smell, so I tossed it out and started a new one. I read more about maintaining your starter and so far so good.
Basic No Knead Sandwich Bread: (Do this before bed)
Mix 3c flour (I use 1c WW and 2c Bread flour), 1tsp salt, 1.5c water and 1/4c starter (which I stir into the water first). Cover the bowl and leave in a warm spot overnight.
In the morning, knock it back and let it rise for 60min, then knock it back again, shape and put in greased loaf pan. Cover and let rise to almost cresting the pan, but not quite…about 20-30min depending on how warm the space is. I do it in the oven with the light on.
When ready to bake, preheat oven to 425F, flour the top of the loaf and snip to score (I go lengthwise, but you can do a few short diagonal ones, too) and put pan in over COVERED! You can use another loaf pan (I do this) or make a foil tent, but give the bread room to grow. Bake 20min, then uncover for 10min. That’s it.
Here’s to Making Some Memories – Nourishing the Heart & Soul – Enjoy!
I’ve made homemade granola bars a couple times before, but this recipe we found in Jean Van’t Hul’s The Artful Year is the best yet! If you aren’t familiar with Jean Van’t Hul she has published two fantastic books on making art with kids and has a great website full of art activities and projects. https://artfulparent.com Her recipe for old fashioned granola bars is simple, easy to follow and has many ingredients you may already have on hand. It’s a great recipe to make with your kids and one the whole family will enjoy!
INGREDIENTS:
2 Cups old-fashioned rolled oats
1 Cup almond meal
1/2 Cup whole wheat flour
1 tsp cinnamon
1 tsp salt
1 Cup dried cranberries
1/3 Cup mini chocolate chips (we just cut up bakers chocolate because that’s what we had)
1/2 Cup (1 stick) butter
1/2 Cup honey
1 Egg
2 teaspoons vanilla
INSTRUCTIONS:
Preheat the oven to 350 degrees F. Oil a 9 x 13 in. baking pan
Mix the oats, almond meal, flour, cinnamon, salt, cranberries and chocolate chips in a large bowl.
Melt the butter in a small saucepan. Whisk in the honey, then the egg and vanilla. Pour the butter mixture into the oat mixture and combine throughly.
Press the dough into the pan and bake for 20-25 minutes.
Cool the baked dough partially, then cut it into bars. The bars can be stored in the fridge or freezer, but ours didn’t last that long!
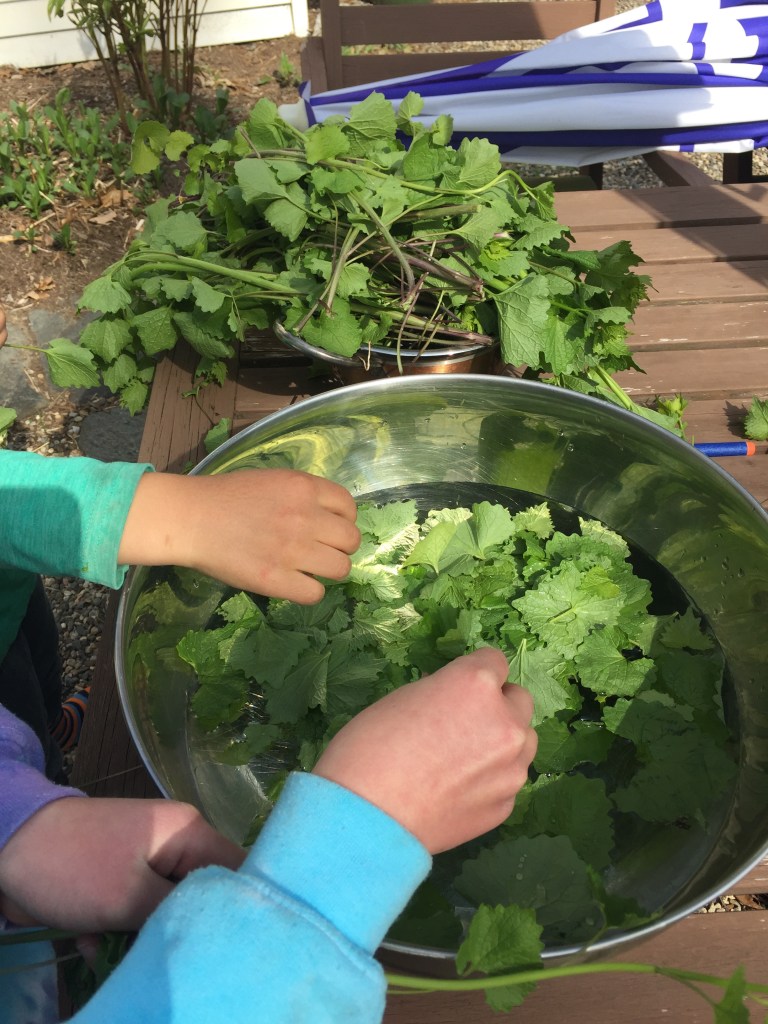
Ava and Leo cleaning the Garlic Mustard they found in the woods off our trail
Have you ever foraged for wild edibles? It’s something I used to do with my dad when I was young. We would hike through the forest looking for his prized “Hen of the Woods,” mushroom that he ate since he was a boy in Italy. He used to collect the mushrooms in a basket so that the spores would be able to fall to the ground and reproduce. I used to be so sceptic of collecting food from the woods and cooking it for dinner! Foraging for mushrooms is still something my dad loves to do and if the season is right and he’s up for a visit he always takes the kids into the woods hunting for mushrooms.
Garlic Mustard is new to me. It is an invasive species that is easy to find, and especially tasty in the spring. Ava took a “Wild Edibles” class at an Environmental Center near us last year and learned a lot about edible plants in our area. I have put my trust in her and with the arrival of the warm weather she took Leo on a nature walk in search of garlic mustard so that she could make us all some delicious pesto. It’s funny, when children feel empowered and given some autonomy to be trusted and do things on their own – they really shine. Ava and Leo were so excited to find the mother load of garlic mustard in the woods on our trail. They picked it, cleaned it and are now busy making it into a pesto to add to tonight’s dinner.
We like using the leaves to make pesto, but they also taste great added to a salad. The leaves, roots and flowers are all edible – the stalks are tasty sautéed if you get to them before they flower. Leaves in any season can be eaten, but they do taste bitter once the weather gets hot. The name’s no lie. Garlic mustard is filled with a fresh garlic character and a fiery mustard bite. The pesto it makes is great on pasta, toast, and as a meat rub. We also love to mix it with some mayo and add it to sandwiches or a cold pasta salad.
These plants are hard to misidentify, but I would recommend looking them up online or getting a good field guide to be sure you are picking the right thing. A telltale sign that you’ve found the right plant is if you crush the leaves or stems they will smell unmistakably of garlic.
Here’s our Garlic Mustard Recipe:
Ingredients:
2 cups Garlic Mustard leaves
1/4 cup walnuts or pine nuts
2 cloves garlic
1/2 cup olive oil (add more depending on desired consistency)
1/2 cup grated Parmesan cheese
(Sometimes we add about 6 or 8 sun-dried tomatoes and some fresh basil)
Directions:
In a food processor or blender combine garlic mustard leaves, nuts, garlic and parmesean
While the processor is running, slowly pour in the olive oil until mixture is smooth.