Adriana, Food, Home School

Baking Bread?

Baking bread from home has been growing in popularity around the globe during this time of great pause. It is an age old tradition that aside from growing your own grain and using rocks to grind it, hasn’t changed all that much over the years. The ingredients are simple, healthy and inexpensive. Nothing quite compares to the smell of fresh bread baking in the oven. If you haven’t yet given bread baking a try, it’s easier than it looks and the taste of homemade bread is well worth the experiment and the wait!

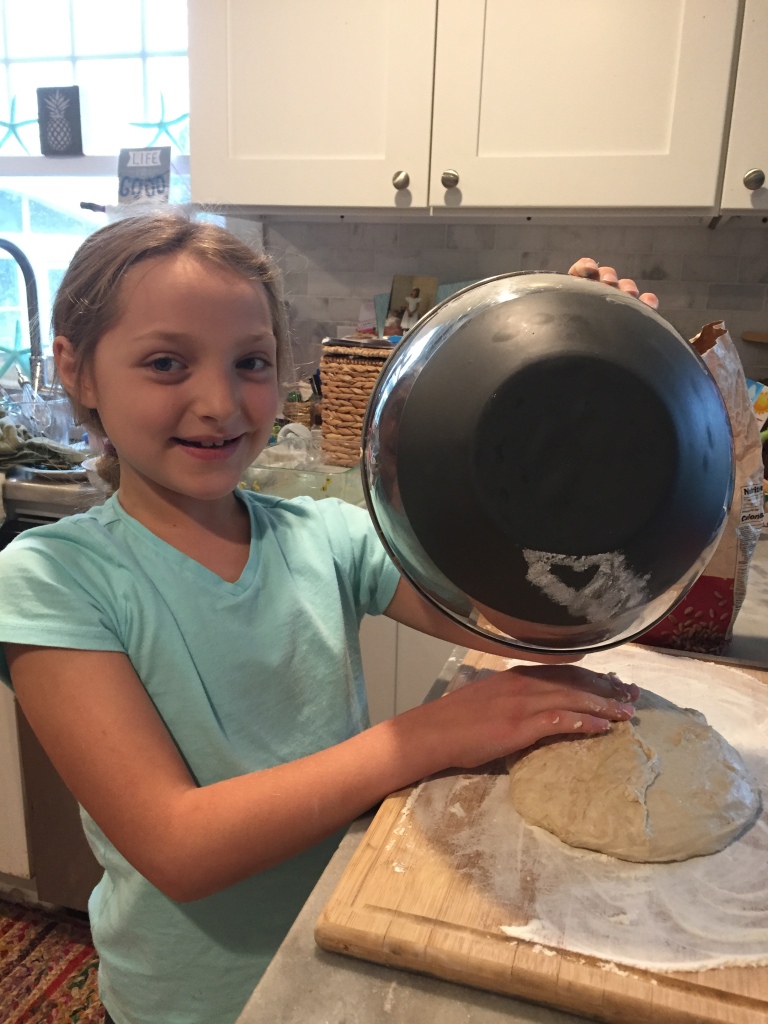
Baking bread has become the new normal in our house. We have even created quite the routine. Ava helps me in the evening prepare the sourdough starter and mix our sandwich bread to sit overnight. Lily has become the official ‘artisan crusty bread’ maker. We have done plenty of experimenting with a variety of recipes from books and online. Not all our bread making has been a success. We’ve made some beautiful looking sandwich breads that have unfortunately crumbled into pieces when we cut them! We also made some pretty hideous looking bagels, but fortunately they didn’t taste as bad as they looked! It truly has been trial and error, but thankfully we have found some wonderful bread recipes that we are sticking too and thought we’d share with those who are tempted to give it a try!

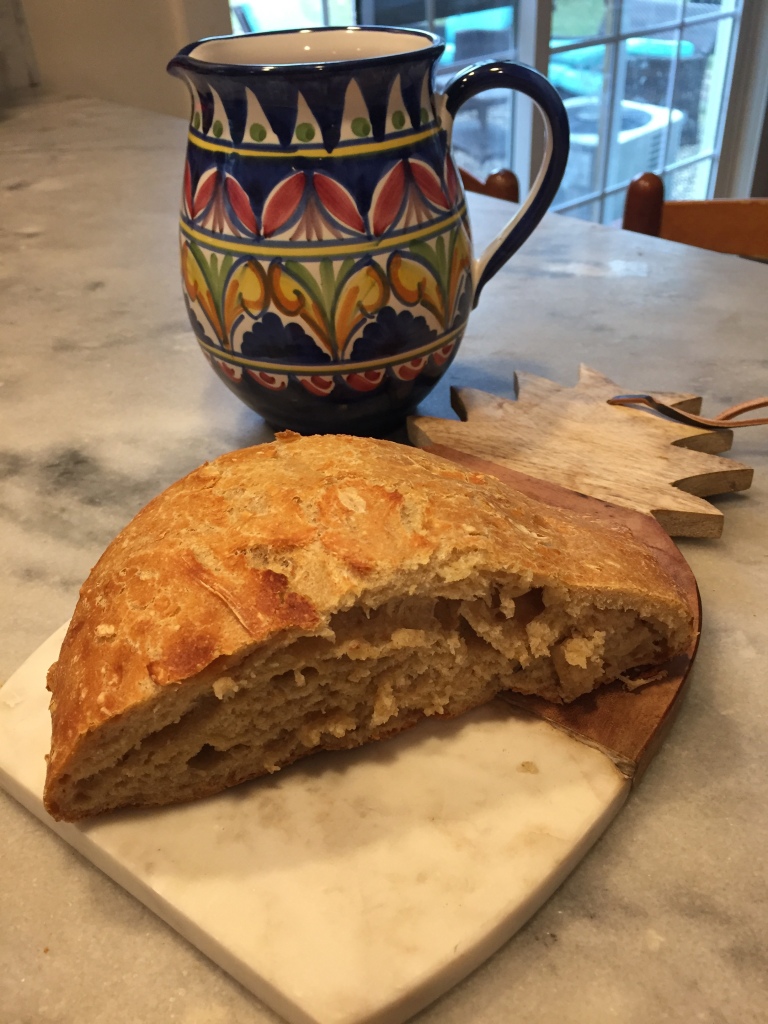
Our favorite and easiest artisan style crusty bread recipe comes from a website I stumbled upon in my bread making searches. This recipe is from a site called Jenny Can Cook. She has a lot of easy recipes and videos that are helpful. For the 3 Cups flour we usually use 2 cups all purpose flour and 1 cup whole wheat. Also, just a note about the water tempature – don’t get scared off if you don’t have a thermometer to test your water temp. We don’t have one, but we have been just fine with a water temp that is warmer than luke warm and just under boiling.

No Knead Crusty Bread

Ingredients:

  • 3 cups all-purpose or bread flour (aerate flour before measuring)
  • 1/4 teaspoon yeast, active dry or instant (1 g)
  • 1 teaspoon salt (6 g)
  • 1 1/2 cups hot water, not boiling (354 mL) – I use hot tap water – about 125-130° F
  • (about 2 Tablespoons extra flour for shaping)

Instructions:

  1. Combine flour, yeast and salt in a large bowl. Stir in water until it’s well combined.
  2. Cover with plastic wrap and let stand at room temperature for 3 hours.
  3. After 3 hours dough will become puffy and dotted with bubbles. Transfer it to a well-floured surface and sprinkle dough with a little flour. Using a scraper fold dough over 10-12 times & shape into a rough ball.
  4. Place in a parchment paper-lined bowl (not wax paper) and cover with a towel. Let stand on counter top for about 35 minutes.
  5. Meantime place Dutch oven with lid in a cold oven and preheat to 450° F. My oven takes 35 minutes to reach 450°.
  6. When oven reaches 450° carefully, using oven gloves, lift the parchment paper and dough from the bowl and place gently into the hot pot. (parchment paper goes in the pot too) Cover and bake for 30 minutes.
  7. After 30 minutes, remove lid and parchment paper. Return, uncovered, to oven and bake 10 – 15 more minutes. Let it cool at least 15 minutes before slicing.

https://www.jennycancook.com/recipes/faster-no-knead-bread/

A really great kids baking book that Nanna sent my kids before the lock down, which has been a lot of fun to explore – especially with more time at home to bake!

Kid Chef Bakes, has been a true gift during the slower pace we now have at home. Nanna’s seem to know just what to send when you’re dealing with a pandemic! The kids and I have baked a lot of recipes from this book and they have all turned out great! The recipes are easy to follow and most ingredients seem to be things you’d have in your pantry. Our favorite bread recipe from this book is the focaccia bread. We make it at least once a week and it’s eaten right up.

Rosemary Onion Focaccia

Ingredients:

For the Bread:

  • 1 Cup warm water (105 to 115 degrees F)
  • 2 tablespoons granulated sugar
  • 1 (1/4 ounce) envelope active dry yeast
  • 3 1/2 to 4 cups all purpose flour
  • 1/4 cup plus 2 to 3 tablespoons olive oil, divided
  • 1 teaspoon table salt

For the Topping

  • 2 tablespoons olive oil
  • 1/2 small red onion, very thinly sliced
  • 1/4 cup shredded Parmesan cheese
  • 2 garlic cloves, minced
  • 1/2 teaspoon table salt
  • 1/8 teaspoon freshly ground black pepper
  • 2 tablespoons fresh rosemary or dried Italian herb mix

Instructions:

  1. Stir together the warm water, sugar and yeast, then let it sit for about 5 minutes
  2. Add 3 cups of flour, 1/4 cup of olive oil and 1 teaspoon salt to the bowl. Mix until well blended. (We do this by hand). Add more flour as needed, a little at a time, until a dough forms. Continue kneading for about 4 to 6 minutes, or until the dough is smooth and elastic.
  3. Grease a large bowl with 1 tablespoon of olive oil. Add the dough, turn to coat, cover with a dish towel and place in a warm, dark, draft-free place to double in size, about 2 hour.
  4. Generously grease the baking sheet with 1 or 2 tablespoons of olive oil.
  5. Transfer the dough to the prepared baking sheet. Spread the dough out into a long oblong shape about 1/2 inch thick. Cover loosely with a dampened dish towel or plastic wrap and return to a warm, dark, draft-free place for 15 to 20 minutes to rest and rise slightly.
  6. Preheat the oven to 400 degrees F and place the oven rack at the lowest level.
  7. Remove the towel from dough and using your fingertips, gently push down on the dough to leave slight dimples. Brush 2 tablespoons of olive oil over the top of the dough. Lay the onion slices on top. Sprinkle the cheese, garlic 1/2 teaspoon of salt (we love course salt), black pepper and the rosemary and/or Italian seasoning.
  8. Bake on the lowest oven rack for 15 to 20 minutes, or until golden brown.
Leo and his personal pizza!

Another great bread recipe from the Kid Chef Bakes book is the pizza dough. Very basic, easy pizza dough recipe that rolls out well and tastes great. Leo has been very excited about making pizza often and is a big help in the kitchen these days. I think it takes a great man to learn his way around the kitchen – so I’m very proud of my little guy and his interest in learning to cook and bake! If you haven’t ever made pizza dough from scratch, this recipe is for you! Buon Appetite!

Homemade Pizza Dough

Ingredients:

  • 2 1/4 to 3 1/4 cups all-purpose flour
  • 1 (1/4-ounce) envelope active dry yeast
  • 1 teaspoon sugar
  • 1 teaspoon table salt
  • 1 cup warm water (105 to 115 degrees F)
  • 3 tablespoons olive oil, divided flour for dusting the work surface

Instructions:

  1. In a large bowl, add 2 3/4 cups of flour and the yeast, sugar and salt.
  2. Add the water and 2 tablespoons of olive oil to the bowl. Mix until the dough forms a soft ball. Mix in additional flour as needed.
  3. Place the dough onto a lightly floured surface and knead until the dough is smooth and elastic 6 to 8 minutes.
  4. Grease a large bowl with the remaining tablespoon of oil, add the dough, turn to coat, cover with plastic wrap of a dish towel and place in a warm, draft-free place to double in size, about 1 hour.
  5. To transform the crust into a pizza, roll out the crust thinly on a floured surface, transfer to a greased baking sheet, then top with desired toppings. Bake at 400 degrees until the cheese is melted and the crust is golden brown, about 10 minutes. (I usually put my pizza crust in the oven for about 5 minutes while it is warming up to start to bake the dough. I then take it out and add the toppings and put it back in for another 5 plus minutes until crust looks a little golden and cheese has melted).

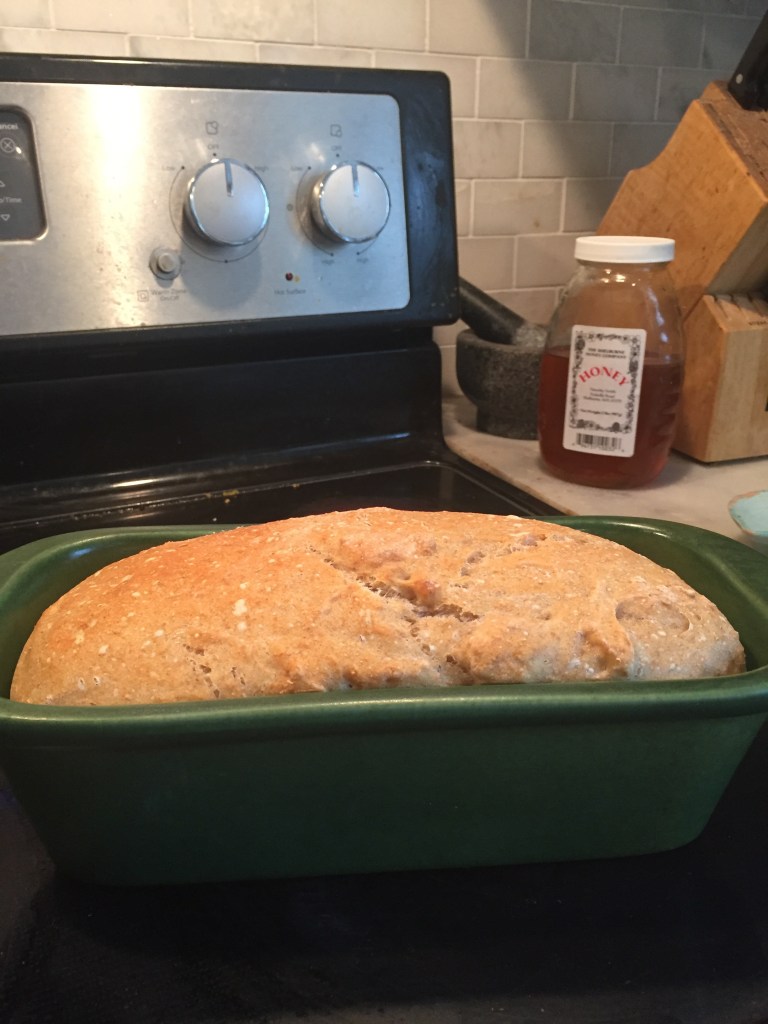
We also continue to make sourdough sandwich bread every other night from a very basic no knead bread recipe. We use a sourdough starter for this one. If you haven’t yet explored making and maintaining your own sourdough starter it is actually less intimidating than it sounds once you get the hang of it. Our original starter developed a pretty funky smell, so I tossed it out and started a new one. I read more about maintaining your starter and so far so good.

Basic No Knead Sandwich Bread:
(Do this before bed)

Mix 3c flour (I use 1c WW and 2c Bread flour), 1tsp salt, 1.5c water and 1/4c starter (which I stir into the water first). Cover the bowl and leave in a warm spot overnight.

In the morning, knock it back and let it rise for 60min, then knock it back again, shape and put in greased loaf pan. Cover and let rise to almost cresting the pan, but not quite…about 20-30min depending on how warm the space is. I do it in the oven with the light on.

When ready to bake, preheat oven to 425F, flour the top of the loaf and snip to score (I go lengthwise, but you can do a few short diagonal ones, too) and put pan in over COVERED! You can use another loaf pan (I do this) or make a foil tent, but give the bread room to grow. Bake 20min, then uncover for 10min.
That’s it.

Here’s to Making Some Memories – Nourishing the Heart & Soul – Enjoy!

Adriana, Food

What to Do…. Bake Bread and Embrace the Pace

Mike and I started this website after traveling this winter with our kids and feeling so good about finding new routes in life and sharing our discoveries with you all.  But oh how life has changed.  Now we find ourselves in unprecedented times: times of fear and stress.  Anxieties over the unknown and isolated.  I don’t have any answers as to how we can stop what is happening right now in our world.  I wish I did.  I continue to pray that those around us with knowledge and power help to put an end to this pandemic.  So, as we wait, in our homes together, I humbly hope that I may be able to bring some calm to your day or even for a moment.  I myself have always loved being a homebody.  I love starting the day slow.  I have always moved at a slower pace, which at times has truly helped me to relate to my children.  Especially when they were younger and slow was a very common pace!  From putting on shoes and jackets, to looking at a puddle in the driveway, bubbles flying in the air or an ant traveling across the sidewalk – embracing the pace, has helped me move forward and connect.  

Surprisingly, we haven’t had to change much around here.  Since we are already homeschoolers, not much has been disrupted with our school schedule and learning, aside from me prepping to be a little more of a homesteader if at all possible!  But, those are lessons I feel are just as important for the kids to learn as is math and reading.  So, over the past week as we have prepared to be at home and social distancing, we have explored our family life and survival world a little deeper than before.  I ran out of bread yeast! To my dismay, so has Stop and Shop! I haven’t made fresh bread any other way.  This is where the internet and google are a gift.  I looked up how to start your own sourdough yeast starter.  I will include a link to the site and directions below.  Instead of starting my own, my kind, resourceful neighbor brought over a sourdough starter that was ready to go along with some chicken and duck eggs!  So, the kids and I have been baking our own bread.  If you’re home is at all like mine, we can’t keep sliced bread enough in surplus around here.  I usually buy extra and freeze it, but it is definitely a staple of our household.  And right now I don’t want to be running to the food store more often then needed, if at all.  Thankfully, there’s nothing like fresh homemade bread and I’m so glad the kids agree and I’m sure you will too after you pull yours out of the oven! 

Some of my fondest childhood memories are spending Sundays at my Italian grandparent’s home in New Jersey.  My grandparent’s made almost everything from scratch.  They didn’t have a yard with grass, they had a giant garden with peach, apricot and fig trees, eggplants, peppers, lettuce, broccoli arabe, herbs, beans, baseball bat squash hanging from the grape vine rafters and of course, tomatoes; rows and rows of tomatoes.  As a kid, I never quite appreciated their uniqueness and resourcefulness.  They never went to Target to find what they needed.  They went to their garage and whatever they were looking for, it was most likely there!  My grandfather was the Italian McGuiver – he could make a chair using wood, plastic and shoelaces!  He used handkerchiefs instead of tissues and he really only had a handful of outfits in circulation.  He made his own bread, cheese, wine and sausage.  And even though I’m not a meat eater, I loved that sausage and still dream about it!  Something special about making it from scratch.  In there basement my grandfather had his wine cellar.  It was a hidden room strait out of a Nancy Drew novel.  After finding your way to the laundry room through the sausage and cheese hanging from the basement ceiling, there was a secret door and inside was a small room with a dirt floor, shelves full of glass jars with tomato sauce made by my grandmother and three giant barrels of fermenting wine.  I always felt so special when my Nonno would take me down there.  We’d sit on a wooden bench and he’d put a giant plastic tube in one of the barrels of wine, suck on it and start the flow.  He’d pour us both a cup and we’d sit there, most often in silence, since I didn’t speak much Italian and he didn’t speak much English, but he’d say, “very good wine, no?” and I’d nod and we’d sit there watching the feet go by the small basement window and guess who was stoping by for dinner.  My grandma, Nonna, made her own bread.  It wasn’t a soft sandwich bread.  It was hard as a rock and in order to eat it, you had to put it in water to soften (she made it in large batches like this because it was easier to store and didn’t go bad like fresh bread). 

It’s funny now to think of such things.  As a young child, I didn’t understand why they worked so hard to make all these things when they could buy them at the store.  I didn’t fully appreciate all the hard work that went into doing what they did.  As I grew older, I had more appreciation.  No one made sauce like my Nonna.  That pretty much goes for everything she made, it all had an unbelievable taste because it was fresh, because it didn’t get shipped in from another country, it was grown and made on location.  And now, reflecting back, I feel I can appreciate their simplicity and hardwork even more.  My grandparents were ready for anything. They had a pantry full of good, supplies (whatever was on sale, they always bought extra even if it meant storing five boxes of toothpaste, it was worth it if it cost them $1 cheaper)! My Nonna’s freezer and fridge were always stocked. They lived through a World War in a small Italian Mountain village.  My grandfather fought in WWII for Italy.  He was in the Navy at age 19 and his ship was sunk; he swam for 11 hours at sea only to be saved by another ship and taken to the USA as a prisoner of war.  My Nonna grew up having to hide food in the brick wall so the police wouldn’t take it because they were only allowed to keep as much as they needed to feed their family and the rest was expected to go to others.  She grew up having to dig trenches outside her home at the age of nine, she had to tend to the garden and the animals, she had to cook, clean, sew and crochet, she had to go to the mill with her grain and grind it up to make flour for baking.  She wasn’t deprived of the beauty of life, but she was taught and trained to be resilient.  To make things last and to appreciate what you had, to go without and to be resourceful.  I share these stories with you, hopes that they give you hope.  That they remind you of your own resilience and those of your ancestors whose blood runs through your veins and those of your children.  We have been blessed as human kind, to not have to go through times like we are experiencing now and although I truly wish we did not have to experience them, I believe they will make us all a little stronger.  Our families, our hearts and our homes.  We will persevere.     

  So, as my home has slowed the pace a little more, I encourage you all to do the same.  To embrace the pace, to bake some fresh bread make a pot of soup and enjoy your time together.  Most families don’t eat meals together never mind cook or bake together.  I am trying hard to keep faith and believe that a greater more beautiful lesson will come from all of this fear and time of unrest.  And I truly believe that there is so much to be said for slowing the pace, for living more simply for taking time for yourself and others to fully appreciate the precious moments and precious gift of life itself.  I pray you are all safe and healthy and that you are able to find moments of peace and calm and be reminded of our true human resilience.  It is a gift we all have.  

Now I go out to rake the vegetable beds and prepare my cold frame for our 2020 Victory Garden.  

With Peace and Solidarity from my home to yours,

Adriana  

Here is a Great link to starting your own Sourdough starter – Good Luck, take your time and Enjoy!

https://holycowvegan.net/make-sourdough-starter/

And Here’s a great No Knead Bread recipe!

Basic No Knead Sandwich Bread: (Do this before bed)

Mix 3c flour (I use 1c WW and 2c Bread flour), 1tsp salt, 1.5c water and 1/4c starter (which I stir into the water first). Cover the bowl and leave in a warm spot overnight.

In the morning, knock it back and let it rise for 60min, then knock it back again, shape and put in greased loaf pan. Cover and let rise to almost cresting the pan, but not quite…about 20-30min depending on how warm the space is. I do it in the oven with the light on.

When ready to bake, preheat oven to 425F, flour the top of the loaf and snip to score (I go lengthwise, but you can do a few short diagonal ones, too) and put pan in over COVERED! You can use another loaf pan (I do this) or make a foil tent, but give the bread room to grow. Bake 20min, then uncover for 10min.

That’s it.

If you’re in a rush, you can shape and rise in the pan first thing, and not do the second rising, but the bread will be more dense.